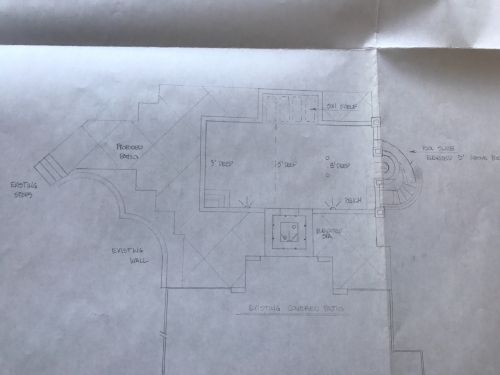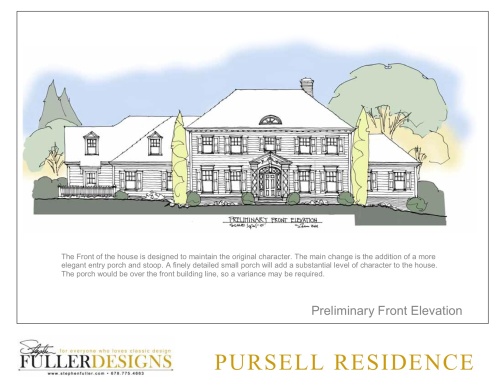
Stephen Fuller Original- Preliminary Design Document
I have received some inquiries about how to build, where to start, whom to call first, etc. First, I am not an expert at all. This is the first and as my husband will yell to you tell you, our last “build”. Truth be told, I would do it again if I had a money tree in the backyard of the new house that I could shake the H-E-Double Hockey Sticks(you figure it out) of and be able to do what I wanted with no limits. Not that everything has to be “expensive”. I am all about a good deal and finding reasonable priced things(wait until you see my kids’ bathroom counters for a great “find). Make no mistake though, money rules ALL when building. I stopped calling what we did a “renovation” at some point because it didn’t do it justice. This was a build with a gut job before. It’s all new.
So, how does one begin? Well, you must have a plan. You know what happens if you don’t have a plan? Bad things. Bad, bad things. You have to WANT to build. My husband is a buyer. He will tell you that- over and over and over and over. I’m fine with a “builder” label. I liked to find pictures of what I loved, put my own spin on it and then create it. It’s satisfying.
When we realized that we would have to build because we just could not find a house that worked for 6 people in the area we desired, I asked a friend that had recently knocked a house down and built how she started. She had a HUGE notebook of pictures, all organized, of what she wanted, etc and I felt like I was 2 ft. tall. I didn’t have a notebook! I had 3.5 kids(Hudson was still cooking). I don’t do notebooks. But, I started collecting pictures. It’s the BEST thing I could have done for myself. Why? Well, when you eventually bid your project out and you meet with builders, most of them are middle-aged (or older) men and I feel certain that my taste and theirs isn’t the same. Specifics are key when building a home and if you don’t have a plan(the pictures, specifics), you will be building the home that the mid-life male builder thinks is “cool”. Not cool.
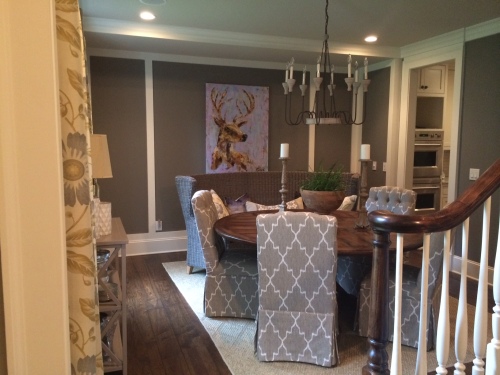
Room by room, I started collecting pictures. Pinterest was just taking off and nobody had “invited” me to Pinterest(loser for those that remember pinterest early days) so I didn’t use that until the house started or maybe just before. So, I used Houzz.com and decorpad to search for “ideas”. My first love though was Southern Accents magazine(R.I.P., sniff, sniff). How could you be from the South and not love that magazine?? My kitchen, keeping room and family room are all due to a home I saw featured from Charlotte, NC that I read about in SA. It helped formulate the look I was going for and it was a critical piece of meeting with the builder and being able to show him what I wanted to see at the end. I had one builder use the term “Level 1 granite” when referring to the kitchen when we went over his proposal and I asked what that meant. He told me like what Home Depot had but I wanted choice. Choice is scary to builders because they do not know how to price choice. That’s where the pictures come in and allowances are formed. You have to understand what the allowance represents and without doing some research, you’re at the builder’s mercy.
Figuring out whether you need to find your lot/house first or meet with the Architect first is like figuring out if the chicken or the egg came first. I could argue either way but if you are looking in an area that doesn’t have much on the market, you have to secure a lot/house and you can’t do anything until you find where you want to be.
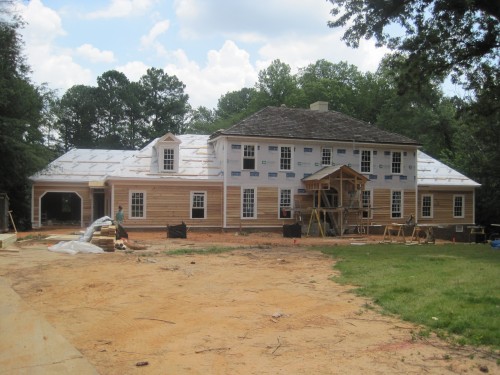
Your Architect is your leader. You have to have a plan and the Architect has the master plan. If you know you want to build, you can meet with the Architect, get started on a plan, get preliminary pricing and then find the lot. We did the opposite. We knew exactly where we needed to be for kids, school and found a house that we thought we could renovate. Then, we went to a builder(not an architect) and were told that we needed to just knock it down and build a new home. We would spend just as much renovating as building and not have a modern, new home to show for it. If only it were that easy!
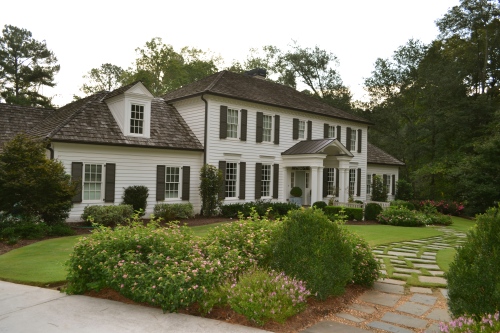
While waiting for our old home to sell, we ended up moving into Yellow House because I was due with a 4th child and I could not try to show the old house with a newborn and 3 other kids. So, within one week, we made the decision to move, called the movers and moved into Yellow House. A month later had our fourth child and sold our old house a couple of months later. Living in Yellow House changed everything. We hated every minute of it but we got to know the neighbors, we got used to looking at Yellow House and the homes around us and when we looked at the rendering of the home we were going to build, it started to seem wrong. That’s when we decided to call an Architect. I had always know the name Stephen Fuller because like any true Southerner I had a subscription to Southern Living magazine and when I heard that his kids went to our kids’ school, we gave him a call. He pretty much walked in the door and told us that we should work with it and not knock it down. That is what we were ready to hear. We just needed someone qualified to tell us that was the right thing to do.
It was then that we started working with an Architect instead of a builder to create what we needed. I gave him a laundry list of items that I wanted to have with the completed house and it was his job to make it work. And he did. He made it work. People will gripe about their builders and complain about cost, etc but you never hear about the architect. They are so instrumental with what you end up with, choose wisely is all I can say. The architect stays with you throughout the entire process so you need to 1. Like him or her and 2. trust him or her. I both liked and trusted mine. I have said before that he was my phone a friend and he really was.
Besides choosing a good architect, the other advice I would give is to pick out what you want before you ever get a price from a builder. The more information you can provide before bidding out your project, the better everyone is. I have gotten questions from friends that are thinking of doing what we have done and when I ask them what they want with the new house, they say I don’t know! You cannot go into a project not knowing what you want. If you do, it’s back to the middle-aged man picking out what you want in regards to tile, counter tops, trim, flooring, etc. and that just doesn’t work. You can’t blame the builder either because if you don’t have a plan, I can assure you that he does and it isn’t a pricey one! It will be the least expensive option and if your taste is beyond that, you’re toast.
So, 1. Get an architect or find a lot and then get an architect
2. Pick out everything- plumbing, counter tops, tile, flooring, any finishes really. Finishes are what you see and what you live with everyday. If you don’t tell your builder that you want a marble countertop, he will price out granite. That’s not his fault. It’s yours. Knowledge is power. The more specifics you provide, the better the process will be and the more accurate the pricing you receive will be.
Hope that helps. If I can pull this off with 4 kids, one newborn, you can too. Surround yourself with good people. Just like anything else in life, the people who you surround yourself with define who you are whether you like it or not. Choose wisely.